Calgary was hit by severe thunderstorms on the evening of August 5, 2024, resulting in heavy rain, flooding, strong winds, and damaging hail. The Calgary airport (YYC) and surrounding areas were hit particularly hard. One of the airport terminals suffered a roof collapse and flooding, and dozens of grounded aircraft were severely damaged by hail.
Early in the morning on August 6, Rapid3D was contacted by several airlines regarding aircraft that had been significantly damaged by hail. The extent of the damage was beyond belief, with numerous dents (hundreds, if not thousands!) covering each plane. Immediate mapping and analysis of the dents was required to establish a repair strategy and facilitate the return of the affected aircraft to service.

The Rapid3D team quickly took action, knowing that time was of the essence for our valuable customers. There was no doubt that the Creaform VXintegrity Aerospace solution would be the best solution for mapping the aircraft panels quickly, accurately, and repeatably. The team went to the YYC hangars to assess the damage and inspect the grounded aircraft. The team aimed to clarify various essential requirements and criteria for the analysis:
1. Establish accuracy requirements for dent depth and size.
2. Select an appropriate 3D scanner based on the accuracy needs.
3. Ensure that the team possessed the necessary safety training to work on the aircraft.
4. Determine the priority of panels to be examined:
a. Crown skins (top of the fuselage)
b. Flight controls.
5. Define and agree on a feasible timeline utilizing Rapid3D's team and operator resources:
a. Coordinate lifts and lift drivers
b. Arrange hangar space for possible tie-offs
c. Organize the Rapid3D internal team for scanning and analysis technicians.
What is VXintegrity Aerospace?
VXintegrity Aerospace is a custom Creaform solution designed for the Aerospace MRO industry. It utilizes a HandySCAN | 3D scanner to capture measurements of aircraft skin surfaces, enabling the VXintegrity Aerospace module to evaluate dents using a virtual pit-gauge. The VXintegrity platform offers a significantly faster and more reliable alternative to manual pit-gauges. Additionally, the software can calculate various dimensions like length, width, maximum depth, A/W ratio, key distances, and create a grid showing the deepest points.
The Process
The HandySCAN | 3D is a metrology grade hand held 3d scanner that is very portable and accurate. The scanner requires positioning targets to be placed on the aircraft surface itself. This allows the scanner to position itself in 3D space accurately, ensuring that our scans have high enough quality and accuracy to do sensitive dent analysis on smooth and large surfaces.
Following the completion of the targeting of the crown skins and flight controls, the team proceeded to conduct 3D scanning of the damaged surfaces. The scanning process was carried out in sections to help manage the subsequent analysis and reports.

Proper labeling and referencing are crucial during aircraft damage assessment to ensure accuracy. Different aircraft types have specific reference names for precise location identification, such as stations, stringers, ribs, and panel edges. Each dent is measured in relation to the nearest reference line, as various panel types have distinct pass/fail criteria based on their location.
One of the great advantages of using scan data to analyze dents is that often, the damages become more clear in the scan data. By turning up the reflectivity of the scan data, which is a simple view option, the dent contours become highly visible. Rapid3D technicians are able to easily see and select the dents to be analyzed.

Once the scan data is gathered, our team trimmed out extraneous data and aligned the panels according to their positions on the aircraft. VXintegrity then applies a virtual pit-gauge to the areas a technician indicates to produce the analysis results.

The software analyzes each dent to extract its contour and dimensions. Pass/fail criteria can be conveniently established within the software to identify particular dents for further examination. Specific failure requirements prompted the development of a macro by Rapid3D to extract comprehensive, conditional data from the automatically produced reports from VXintegrity.
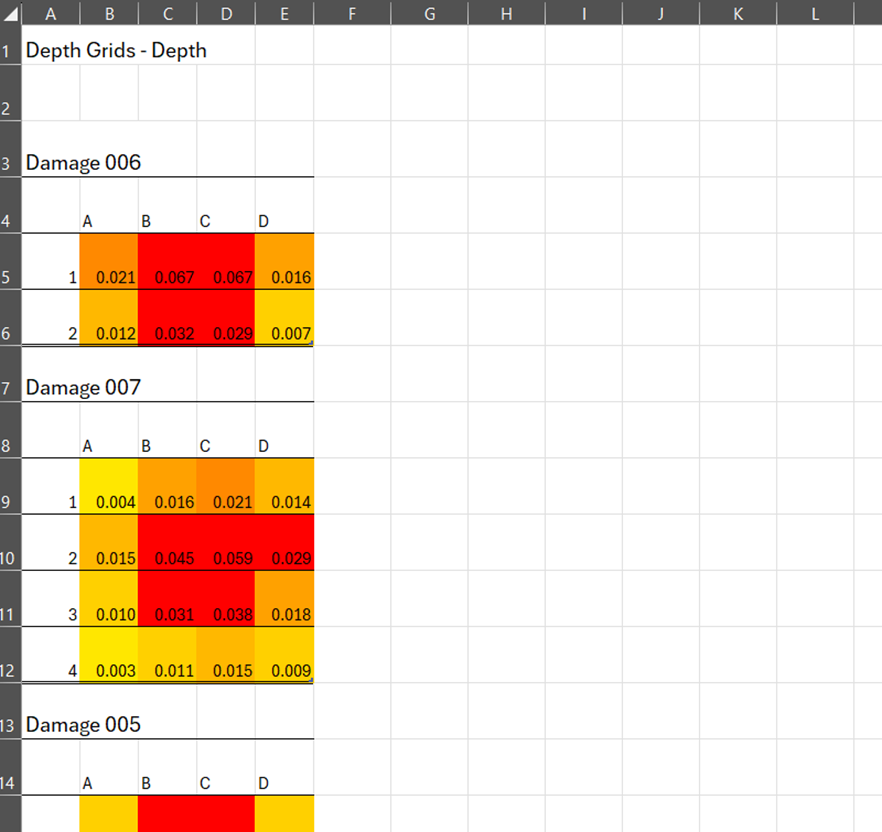
The reports generated contain a lot of significant information. It summarizes all damages on the panel in easily reviewable tables, but also contains highly detailed information on each dent. The software also generates a deepest-point grid at a chosen interval, projected onto each damage to better understand its depth and shape.

Everyone at Rapid3D, in some way, was involved with the hail damage assessment response. We had onsite scanning technicians, project managers, scan-data processing personnel, dent analysts, project reviewers, and of course our amazing administrative team. We had the internal knowledge and expertise required to execute on a project of this magnitude, including the 3D scanners, analysis software, and personnel.
Quick Facts:
The hailstorm that caused so much damage to these grounded aircraft is thought to be the second most expensive weather-related disaster in Canadian history
Rapid3D analyzed almost 21,000 dents over dozens of aircraft
We saved our customers hundreds of hours of manpower and down time on their aircraft


Comments